


 I’m talking about the secrets to grilling the perfect hamburger, of course. There are many steps in the creation of a juicy, flavorful, and tender grilled burger. Labor Day weekend is coming up so here’s your last chance this summer to master the grill and that elusive juicy burg.
I asked the folks at Morton’s to share with me their tips and a recipe, and they graciously helped me out. The recipe from Morton’s specifies a coarse-grind ground sirloin, which Whole Foods didn’t seem to carry.
I see it coming… I’m about to learn something again.
The butcher at Whole Foods gave me a bit of an education. It turns out that most ground meat is passed through a fine blade, twice. And the meat they use is different, usually a chuck. (Meats come in many grades of fat. The higher the fat content, the moister the burger, but it also leads to shrinkage as the fat melts away. Less fat means a leaner burger, but also drier and potentially with a denser texture.)
The butcher was more than happy to grind up the sirloin of my choice using the coarse blade. She even showed me the three types of blades they use (see picture). She just advised that I would have to pay extra for the more expensive meat and for the waste left behind in the grinder. I spent $38 (and hoped it would be worth it.) One benefit to ordering ground meat this way is that you know that there is only one meat in your mix, a health concern for some.

The recipe calls for raw eggs and tomato juice. The eggs will hold the chunky meat together and the tomato juice adds moisture and acts as an acidic tenderizer.
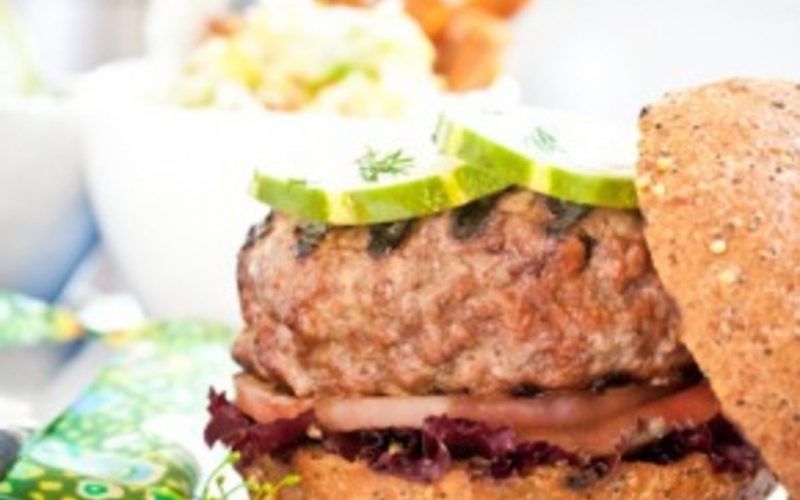
The combination of their recipe, handling and grilling tips, and my own preferences led to what I’d like to call: a burgasm. This was a steak burger – juicy, seasoned perfectly, tender, and moist. This could be THE best burger, ever. My only edit to the Morton’s recipe is to make a slightly smaller burger than the 12 ounces their recipe suggests.
Morton’s Executive Chef Bob Wiltshire has given these 5 tips for grilling the perfect burger. I’ve also included a few of my own:
Tip 1: It all begins–and ends–with the beef
Look for USDA prime, grain-fed aged beef, preferably coarse-grind, ground sirloin (with 20% fat). Look for superior marbling — the fat speckled throughout the meat that gives the steak its great flavor. Marbling is a primary indicator of a meat’s caliber.
Tip 2: It’s got to be hot!
Morton’s Chef Bob Wiltshire recommends to pre-heat the grill to 600-800 degrees and keep it at that temperature for 30 to 45 minutes before putting the burgers on. It’s during the first few minutes of grilling that the high temperature sears the meat, forming the coating that seals in those tasty juices. In fact, several of Morton’s chefs agree that high direct heat is almost as important as the meat itself. “It is a lot of trial and error to figure out how your grill works,” he said. “Some grills don’t heat evenly or cool faster, you just have to get to know your cooking surface and then you can know how long you have to keep the meat on.” (I actually grilled mine on an indoor cooktop grill pan, heating it just shy of the smoking point.)
Tip 3: Season
Add a bit of seasoning before placing the burger on the grill. Some salt and pepper can do wonders. “You don’t need much,” Wiltshire noted. “A lot of the flavor should already be there, this just adds some more on the surface.” (I like to add flaky sea salt just before it hits the grill.)
Tip 4: The perfect turn
Always use tongs or a spatula to turn over a burger during grilling. And resist the temptation to use a fork to test the burger for ‘doneness’ as it’s being grilled. A fork will pierce the meat and allow the juices to seep out. Sticking a fork (or a meat thermometer) into a burger during grilling is almost like testing an egg by breaking it open while it’s being boiled. “Never smash your burger either,” he quipped. “That is a bad habit a lot of grillers have. It just pushes out the juices.” And, one good turn is enough he emphasized. After you put your burger on the grill, don’t turn it over before at least five minutes of grilling have elapsed on one side. Turning too soon can prevent searing from taking place. The burger should be seared on one side, then turned, seared on the other side and allowed to cook to the preferred doneness. Won’t let go? If the burger sticks to the surface when you’re trying to turn it over, stop trying. It’s a sure sign that it needs more searing on that side. Give it more time. “Patience, it’s tough for some.”
Tip 5: Medium or rare? A done deal
There’s a much better doneness test recommended by the Morton’s chefs, and you carry the necessary equipment with you at all times: It’s all in the palm of your hand:
For a rare burger: Squeeze the pad at the base of your thumb. It should feel spongy and offer very little resistance.
For a medium burger: Press on the middle of the palm of your outstretched hand. It should feel firm and snap back quickly.
For a well-done burger: Squeeze the base off your small finger. It should feel very firm, with almost no give. However, Morton’s chefs strongly advise against cooking beyond medium, noting that doing so is likely to dry out the meat and rob it of its flavor and tenderness.
OTHER TIPS FROM THE ThePatricianPalette:
Don’t over work the meat
Overworking the meat with your hands causes the fat to melt. This will result in a drier, denser texture.
Shaping and Weighing
Shape them quickly without packing them too much. Overpacking will result in a dense burger. Consider the size of your bun and shape your burgers slightly larger because they will shrink as water and fat cooks off. Burgers made with sirloin (and thus less fat) will shrink less than lower grade, higher fat meats. Weigh each portion so that all patties are consistent. This ensures they will cook at the same rate.
Oil the burger, not the grill
Oiling the grill can lead to flair ups on parts of the grill that aren’t being used. I like to massage grapeseed oil directly onto my burgers and then sprinkling flaky sea salt onto both sides just before grilling.
Let it rest
Burgers fresh off the grill are filled with bubbling juices. Biting into one right away could result in all those juices dripping down your chin. I like to transfer them into a covered container for a few minutes to trap steam and any escaping juices. This is a great technique if you want a medium or well-done burger as they will continue to cook without the risk of charring from the grill. The au jus left in the container can be drizzled back over your burgers.
The bun
Brush a light amount of oil on the cut side of your bun, rub with a cut clove of garlic, sprinkle with flaky sea salt, then grill just till lines form (30 seconds or less)
Morton’s Hamburgers
Serves 6 (really huge burgers – I made mine slightly smaller and made more of them)
(Recipe slightly modified by TPP for grilling versus broiling)
4 pounds coarse-grind ground sirloin
4 large eggs
¾ cup tomato juice
1 tablespoon salt
1 teaspoon freshly ground black pepper
Flaky sea salt*
Grapeseed oil*
In a mixing bowl, combine the sirloin, eggs, tomato juice, salt and pepper. Use your hands or wooden spoon to mix thoroughly. Divide the meat into six equal portions and gently form them into patties. Use a small sharp knife and cut a crosshatch mark on the top of each burger about 1/8 inch deep. (This lets the juices percolate through the burger).
*Massage grapeseed oil onto both sides of the patty. Sprinkle flaky sea salt onto the first side to be grilled. Add sea salt to the other side just before you flip it.
Grill using guidelines above. *Allow to rest in a covered container to preserve juices while you grill the buns.
*TPP additions
FOOD STYLING BY: THE PATRICIAN PALETTE
PHOTOS BY: MARK WOOLCOTT PHOTOGRAPHY
A burgasm?! Brilliant!